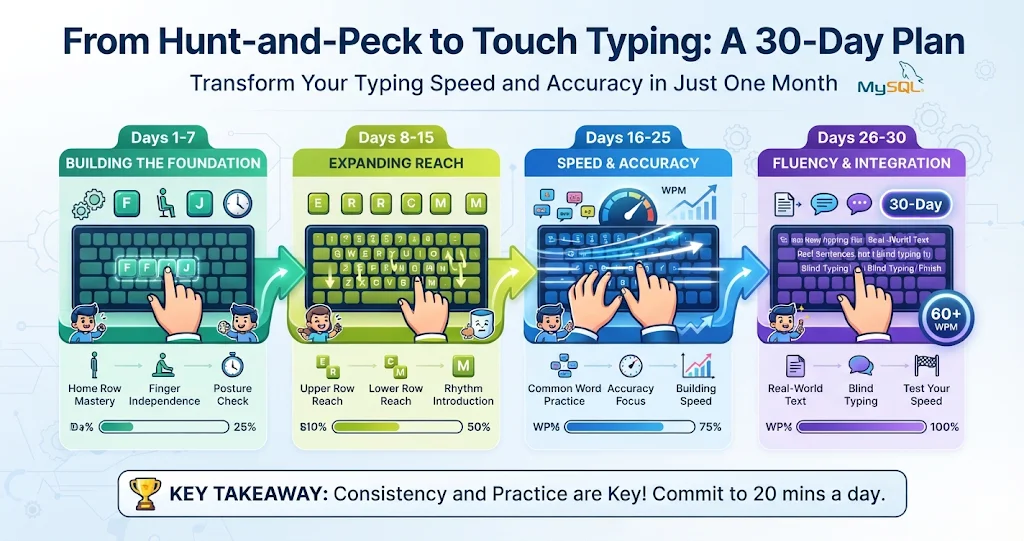
If you type with two or three fingers and glance down every few words, you are in very large company — and you can probably already type faster than you think. The trouble is that hunt-and-peck hits a ceiling, and it ties your eyes to the keyboard instead of your work. Touch typing removes both limits. Switching takes about a month of short, deliberate daily practice, and it comes with an awkward stretch where you feel slower than before. This plan tells you exactly what to do each week so you get through that stretch and out the other side.
We covered why touch typing is still worth learning in Why Touch Typing Still Matters in 2026. This post is the practical how.
Before you start: three ground rules
- Measure a baseline. Take a one-minute typing test today, your old way, and write down your words per minute (WPM) and accuracy. You will want this number in week three when it feels like nothing is improving.
- Never look down during practice. This is the whole game. If you have to, drape a light cloth over your hands for the first week. Looking “just once” rebuilds the old habit.
- Short and daily beats long and occasional. Plan on 15–20 minutes a day. A two-hour session on Sunday does far less than seven short ones.
The home position and finger map
Everything in touch typing is measured from the home row. Rest your fingers lightly on it:
- Left hand: little finger on A, ring on S, middle on D, index on F.
- Right hand: index on J, middle on K, ring on L, little on ;.
- Thumbs: resting on the space bar (use whichever thumb feels natural).
Feel for the small raised bumps on F and J — they exist so you can find home without looking. Each finger then owns a diagonal column of keys:
| Finger | Left hand keys | Right hand keys |
|---|---|---|
| Index | R T F G V B (and 4 5) | Y U H J N M (and 6 7) |
| Middle | E D C (and 3) | I K , (and 8) |
| Ring | W S X (and 2) | O L . (and 9) |
| Little | Q A Z, Tab, Caps, Shift (and 1) | P ; / ‘ [ ], Enter, Shift (and 0 -) |
The index fingers do the most work: each one covers two columns. After every keystroke, the finger returns home. For capitals, use the Shift key on the opposite hand from the letter.
TypingDesk — A Finger Guide That Keeps Your Eyes Off the Keys
TypingDesk starts exactly where this plan does: a colour-coded finger-placement guide that shows which finger presses each key, the home row and the F/J bumps. As you type, correct keys turn green, mistakes red, and the on-screen keyboard highlights the next key — so you look at the screen, not your hands. Beginner lessons build from the home row to all letters, with real words made only from the letters you have already learned.
Week 1 (days 1–7): the home row and its neighbours
Goal: type the home-row letters without looking, with 95%+ accuracy. Speed does not matter at all this week.
- Days 1–2: only A S D F J K L ;. Drill patterns like
asdf jkl; fjfj dkdk slsl a;a;, then real words built from them: sad, lad, fall, flask, ask, dad. - Days 3–4: add E and I (middle fingers reaching up) plus G and H (index fingers reaching inward). Now you can type fish, ride, glide, shield.
- Days 5–7: add R T U Y and O. The top row is mostly reach-and-return from home.
Daily session: 3 minutes warm-up on yesterday’s keys, 10 minutes on the new keys, 5 minutes typing real words with everything you know.
Week 2 (days 8–14): the full alphabet
Goal: every letter by touch. Accept that this is the slowest-feeling week.
- Days 8–10: finish the top row (Q W P) and start the bottom row (C V B N M). Bottom-row keys are reached by curling the finger down, then returning.
- Days 11–12: the awkward ones: Z X, comma and full stop. Little and ring fingers are weak at first — slow down rather than letting a stronger finger “help”.
- Days 13–14: all-letter sentences and common words. Pangrams such as the quick brown fox jumps over the lazy dog exercise every key.
This is where most people quit, because their touch-typing speed is now well below their old hunt-and-peck speed. That is normal and temporary. Keep using your old method for urgent real work if you must, but do your daily session strictly by touch.
Week 3 (days 15–21): capitals, punctuation and real text
Goal: type ordinary sentences by touch, at or near 95% accuracy.
- Shift discipline: opposite-hand Shift for every capital. It feels clumsy for a few days, then automatic.
- Punctuation: apostrophes, question marks, quotes and hyphens. Practise them inside real sentences, not as isolated symbols.
- Common word drills: the 100 most common words in your language make up a large share of everything you type. Getting the, and, that, with, have, this smooth pays off everywhere.
- Start switching real work over — emails and chat first, where speed matters less.
Week 4 (days 22–30): numbers, flow and the full switch
Goal: touch type everything, and match or beat your day-one baseline.
- Number row: reach up from the home row with the same finger that owns that column. If you use a lot of figures, also practise the numeric keypad with 4 5 6 as its home row (the 5 usually has a bump).
- Your own text: paste in paragraphs from your actual work — reports, code, customer emails. That vocabulary is what you need to be fast at.
- Timed tests twice a week: compare with your baseline. Many people pass their old speed somewhere in weeks three to five, with much better accuracy.
- Day 30: stop allowing hunt-and-peck at all. From here on, speed comes from everyday typing plus a few minutes of practice.
TypingDesk — Weeks Three and Four, Sorted
When you are ready for capitals, punctuation and numbers, TypingDesk has a capitals-and-punctuation bridge, then Intermediate, Advanced and Code lessons — or paste your own text. Practise in Timed, Quota, Zen, Repeat-until-perfect or Dictation mode, and when drills get dull, five typing games (Letter Rain, Word Blaster, Survival, Speed Sprint and Typing Duel) keep the habit going. Runs fully offline, on the Microsoft Store with no subscription and no ads.
Troubleshooting the first month
- “I keep looking down.” Cover your hands, or practise with a tutor that shows the keyboard on screen so there is nothing to gain by looking.
- “One finger keeps doing another’s job.” Slow right down on the keys it steals. Accuracy at a crawl is progress; speed with the wrong finger is not.
- “My wrists ache.” Keep wrists level and floating, not bent up and resting on a hard edge. Take a break, shake out your hands, and never push through pain.
- “I missed three days.” Pick up where you left off, with an easy warm-up. Missing days slows you down; quitting is the only real failure.
- “I need a different keyboard layout.” The same plan works for AZERTY, QWERTZ, Dvorak or Colemak — only the letters on the home row change. For Urdu and Arabic, see our guide to learning to type in Urdu and Arabic on Windows.
Key takeaways
- Record a baseline WPM and accuracy on day one so you can see real progress later.
- Learn the home row and finger columns first; every keystroke starts and ends at home, found by the F and J bumps.
- Add keys in small groups: home row, then top row, bottom row, capitals and punctuation, and finally numbers.
- Practise 15–20 minutes every day and never look down during practice.
- Expect to feel slower in week two; that dip is the old habit being replaced, not a sign of failure.
- Finish the month by practising on your own real text and retiring hunt-and-peck for good.
Leave a Reply