A good software tutorial needs three things on screen at once: what you are doing, what you are saying, and you — the small camera inset in the corner that keeps a walkthrough from feeling like a robot reading a manual. Most people assemble that from two or three tools: one app to capture the screen, another to record the camera, and an editor to line them up. This guide does the whole thing in one free Windows app, start to finish, in about ten minutes.
We will use BackendStudio, a screen recorder and multi-track video editor in a single app. By the end you will have an MP4 with your screen recording, your narration and a webcam overlay in the corner — ready to upload to YouTube.
What you need before you start
- Windows 10 or 11 and BackendStudio installed from the Microsoft Store.
- A microphone — a headset or USB mic beats a laptop’s built-in mic by a wide margin.
- A webcam, if you want the talking-head corner. It is optional; everything else works without one.
- A tidy desktop. Close the chat apps and the inbox before you record — notifications are the number one reason a good take gets binned.
BackendStudio — Screen Recorder & Video Editor for Windows
BackendStudio records your screen with system audio, microphone and an optional webcam overlay, then lets you edit on a multi-track timeline — cut, split, trim, mix audio, add titles and transitions — and export MP4, MOV, WebM or GIF. Free to use, works entirely offline, and nothing is ever uploaded.
Step 1: Choose what to record
Open BackendStudio and start a new project. The Recording panel is the first item in the left rail, and the Source dropdown decides what ends up in the frame:
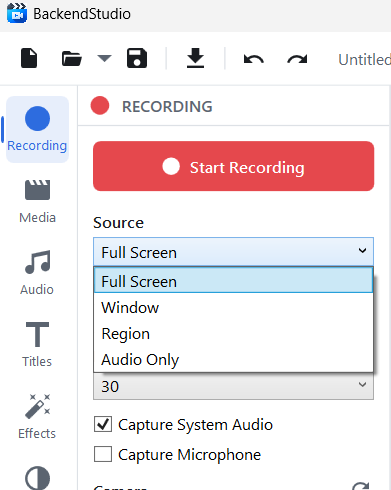
- Full Screen — the simplest choice, and the right one when your tutorial moves between apps. Pick which monitor under Display.
- Window — captures one application and nothing else. This is the safest option for a tutorial: notifications, your taskbar and anything else on screen stay out of the recording.
- Region — drag a rectangle when you only want part of the screen, such as a single panel of a web app.
- Audio Only — for voice-over, which we will come back to at the end.
Leave Frame Rate at 30 fps. It is the sweet spot for a screen tutorial: 60 fps doubles your file size for footage that is mostly static text, and 24 fps can make mouse movement look stuttery.
Get the audio right
Two checkboxes, and both matter:
- Capture System Audio records what the computer plays — UI sounds, a video you are demonstrating, an alert you want the viewer to hear.
- Capture Microphone records your narration. Tick it, and a live level meter appears next to it. Say a sentence at your normal speaking volume and watch it move before you record anything. Thirty seconds of checking here saves you re-recording a silent ten-minute take, which is the single most common way a tutorial recording is wasted.
Step 2: Add your webcam overlay
This is the part that makes it feel like a person made it. Pick your camera from the Camera dropdown:
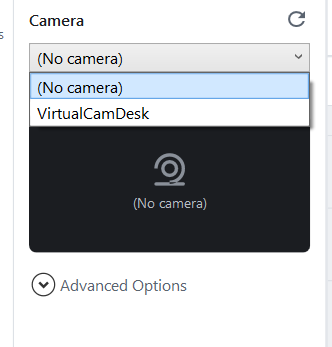
As soon as you select a device, the Camera Preview panel goes live. Use it: check your framing, your head-room and your lighting now. The preview releases the camera the moment recording starts, so the recorder gets exclusive access to the device — no fighting over it, no dropped webcam track.
If your camera is in use by a video-call app, close that app first. BackendStudio will tell you if the camera could not be opened, and — this is the important part — your screen recording is still saved regardless. A camera problem never costs you the take.
Step 3: Record
Press Start Recording. A countdown appears in the middle of the screen so you have a moment to switch to the window you are demonstrating:
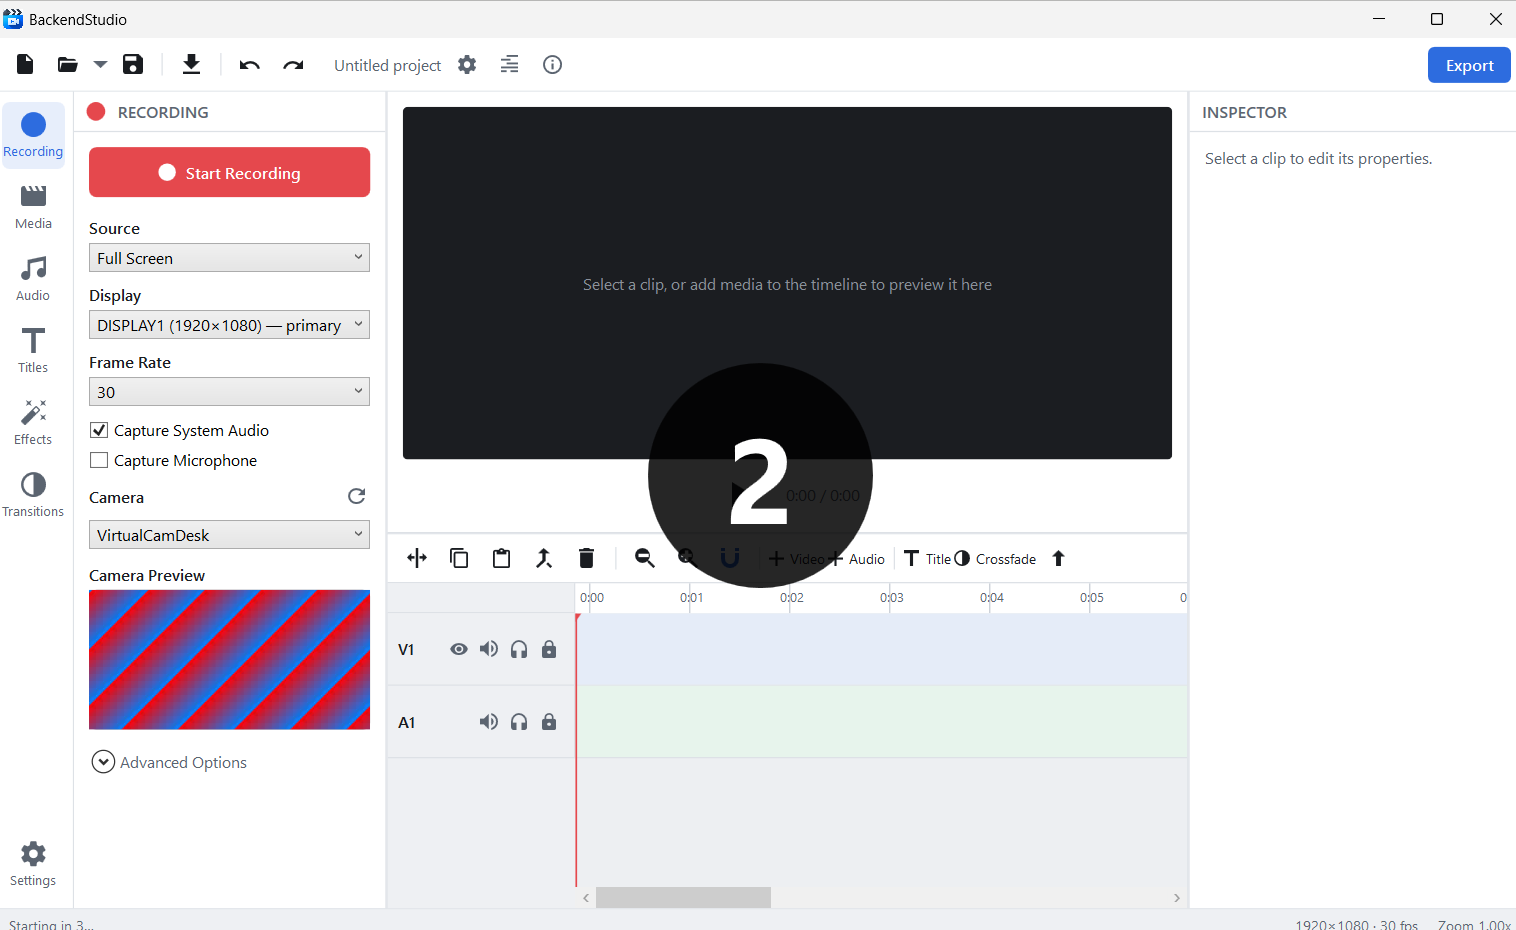
Now the two shortcuts worth memorising, because while you are recording BackendStudio is behind whatever you are demonstrating:
- Ctrl+Shift+F9 — start and stop recording.
- Ctrl+Shift+F10 — pause and resume.
Both work system-wide, from any application. Without them, stopping a recording means alt-tabbing back into your own shot — which then has to be edited out.
Pause is the feature that saves tutorials. Lost your thread, need to read the next step, or the phone rings? Press Ctrl+Shift+F10, sort it out, press it again. The paused time is cut out of the finished video, not recorded as a frozen screen — so a ten-minute recording with a five-minute interruption in the middle is still a ten-minute video, with no dead air to trim later.
Step 4: Your overlay is already positioned
Stop the recording and both clips land on the timeline automatically: the screen capture on the lower video track, the webcam on the track above it — scaled to a quarter size and parked in the bottom-right corner. The preview shows you the finished composite immediately:
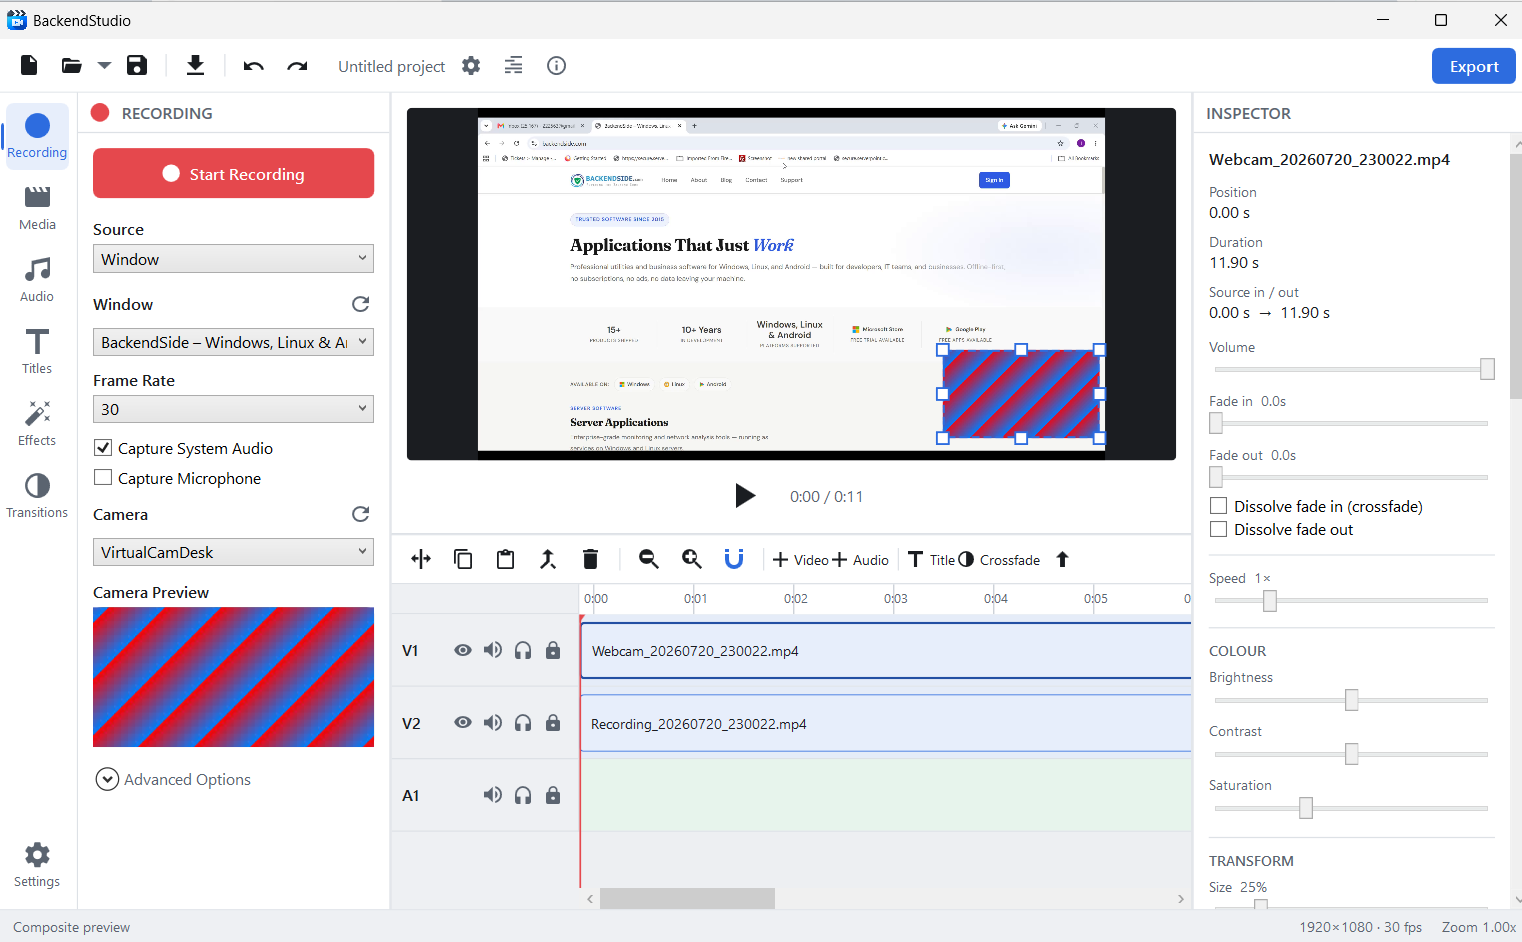
To move or resize the overlay, double-click it in the preview and drag the handles directly on the picture. Or select the webcam clip and use the Inspector on the right, where Size, Position X/Y and Opacity are plain sliders. The default 25% in the bottom-right suits most tutorials; move it to the opposite corner when it covers something that matters, such as a sidebar or a toolbar you are demonstrating.
Because the webcam is a separate clip rather than burned into the recording, you can also do things a single-file recorder can’t: trim it independently, drop it entirely for the sections where your face isn’t needed, or fade it in and out.
Step 5: Trim the dead ends
Almost every take starts with a few seconds of you reaching for the keyboard and ends with you reaching for the stop button. Cut both:
- Drag the playhead to where the tutorial really begins.
- Press Ctrl+K to split the clip there, select the dead piece and press Delete.
- Do the same at the end. To close the gap left behind, use Shift+Delete (ripple delete) instead — it removes the clip and pulls everything after it back.
Editing is non-destructive: your original recordings on disk are never modified, and Ctrl+Z undoes anything. If you want to mark a spot to come back to while reviewing, press M to drop a marker on the ruler.
Step 6: Export for YouTube
Click Export and take the defaults — they are already what YouTube wants:
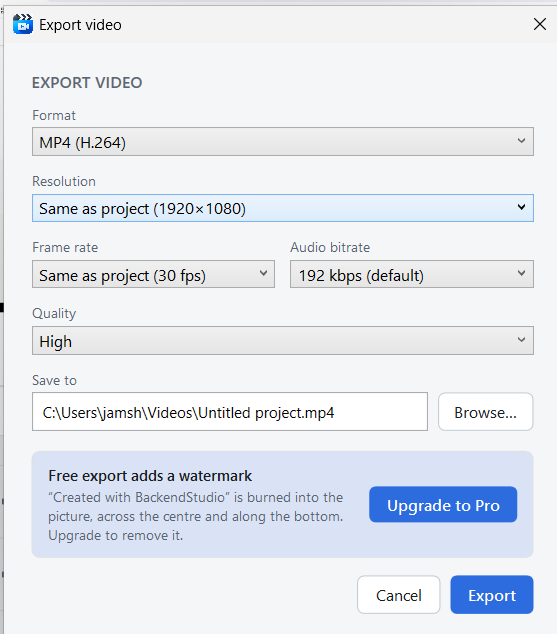
- Format: MP4 (H.264) — the format YouTube recommends and every device plays. MOV, WebM, HEVC and animated GIF are also available if you need them.
- Resolution: Same as project — 1920×1080 for a standard tutorial. Don’t upscale; it adds file size and no detail.
- Frame rate: Same as project — keep the 30 fps you recorded at.
- Quality: High — YouTube re-encodes whatever you upload, so give it the best source you can.
Export uses your GPU’s hardware encoder when there is one (NVIDIA, Intel or AMD) and falls back to a built-in Windows encoder when there isn’t — so it works on any machine, just faster on some than others.
A note on the watermark, and Pro
BackendStudio is free, and every recording and editing feature described above is in the free version — no time limit, no feature gates, no account. Free exports carry a “Created with BackendStudio” watermark burned into the picture. The one-time BackendStudio Pro add-on, bought from inside the export dialog, removes it. Nothing else changes.
Worth knowing while you work: the watermark only appears in exported files. The editing preview stays clean, so it never gets in the way while you are cutting.
Two extras worth knowing
Record narration over footage you already have
If you would rather demonstrate first and narrate afterwards, set Source to Audio Only and tick Voice-over. BackendStudio plays your edited timeline while recording your microphone, so you can talk over your own footage and have the narration land in sync on its own track.
Show your clicks
In Preferences, the Click ripple setting draws a marker wherever you click — Ring, Filled Dot or Halo. For a software tutorial this is a genuine comprehension aid: viewers can see exactly where you clicked instead of guessing from a cursor that moved too fast. It is off by default, so turn it on before you record — it is captured during recording, not added afterwards.
Key takeaways
- Record screen, microphone, system audio and webcam in one pass — the webcam arrives as its own clip, auto-placed as a corner overlay you can move, resize or remove.
- Ctrl+Shift+F9 starts and stops, Ctrl+Shift+F10 pauses — system-wide, so you never have to alt-tab into your own shot. Paused time is cut from the finished video.
- Check the microphone level meter before you record. It is the cheapest insurance in video production.
- Trim with Ctrl+K and Shift+Delete, then export MP4 (H.264), 1080p, High — exactly what YouTube wants.
- Free to use and fully offline; free exports carry a watermark that the Pro add-on removes.
That is a complete tutorial video — recorded, edited and exported — without a second application or a single upload.
BackendStudio — Screen Recorder & Video Editor for Windows
BackendStudio records your screen with system audio, microphone and an optional webcam overlay, then lets you edit on a multi-track timeline — cut, split, trim, mix audio, add titles and transitions — and export MP4, MOV, WebM or GIF. Free to use, works entirely offline, and nothing is ever uploaded.
Leave a Reply